Friday, April 29, 2011

Simple Hummus


I like complicated, many ingredient recipes. I like using more then one pot, chopping, steaming, measuring,  getting out my Kitchen Aid mixture.  But sometimes, you just want a simple recipe. Something you can just whip up when the urge strikes you and have little clean up, and have it ready in minutes. That's how easy it is to make homemade hummus dip. I found a "5-minute" recipe for hummus in an issue of Real Simple, and I made it even easier (so my version is, like, 4-minutes) and used even fewer ingredients. And it's so good. Lick the bowl good.

Hummus (adapted from Real Simple)

Ingredients

1 15-ounce can chickpeas, drained and rinsed
1-2 cloves garlic
1/4 cup olive oil
2 tablespoons fresh lemon juice
1 teaspoon ground cumin
1 teaspoon scant kosher salt

1. In a blender or food processor, mix all ingredients together and puree until smooth and creamy. Add 1-2 tablespoons water, if necessary, for desired consistency.

2. Serve with pita chips, chopped veggies, or use as a spread on sandwiches.

Tuesday, April 12, 2011

Outdoor Cooking


I know in some places in the country, there's still a chill in the air, but here where I live it's starting to get warm. Warm enough, that firing up the grill for dinner is becoming an option some evenings. Last night it was a warm evening, and my son was happily playing in the sunshine, and I decided instead of using the oven for the meal I had planned, I'd just move my cooking outdoors. The chicken breasts that were going to go in the oven and the asparagus that was headed for a pot of boiling water went out onto the grill. I added some mixed greens and boiled the new potatoes, and topped it all off with a mustard vinaigrette. Even my four year old devoured the asparagus.  Delicious warm weather meal, eaten happily on our little patio in the sunshine.

Grilled Asparagus

Ingredients

1 lb asparagus
2 Tbsp olive oil
Sea Salt

1. Toss the asparagus with the olive oil and sprinkle with coarse sea salt to taste.

2. Place on a hot grill (350-400 degrees). Grill, turning, for 5-10 minutes.

3. Serve plain or with mayonnaise.

Monday, April 11, 2011

Spring Salad


Last week, the first vegetables in our garden began appearing. Small carrot greens, wisps of green onions, pert little green shoots of garlic. And the radishes. The radishes, their little red bodies poking out of the earth under their leafy green tops saying, "Yes! Spring is here!" I think my love for radishes is solely based on them being the vegetable that is ready to eat first. They warm my gardener's heart with the promise of all the vegetables to come. And they also taste pretty good.
My little boy excitedly checks the radish bed everyday and patiently looks at each little plant and determines if it's ready to pick. And last week, they were:


I made this fantastic spring salad with them. So simple: just an avocado, some carrots slices, and the radishes, topped with balsamic vinegar and olive oil. So simple, yes, and so good. Hello, Spring.

Spring Salad

1 ripe, but firm, avocado
4 small radishes
1 large carrot

1. Cut the avocado into small chunks. Slice the carrot into thin strips. Cut the radishes into thin circles. Mix together. Drizzle with balsamic vinegar and olive oil dressing (see below).

Simple Salad Dressing

1-2 cloves garlic
4 Tbsp balsamic vinegar
Dash of course salt
8-10 Tbsp olive oil

1. Crush the garlic cloves. Add the vinegar and mix together, with the salt.

2. Whisk in the oil.

3. Transfer to a sealed bottle and shake until oil and vinegar are completely mixed together.

Monday, March 14, 2011

Granola Bars


My family loooves granola bars. My son would go through a whole box of the store bought ones in, like, 3 days if I don't watch him. My husband is a big fan of them for breakfast. However, I don't particularly like the store bought ones. I nearly fell over when the "New Recipe, Same Taste!" announcement on the trusty brand I'd been buying for over a year turned out to be an extra billion (give or take a few) grams of sugar.Which made me stop buying them. But my son (and husband) missed them. So I started searching for homemade granola bars recipes, and after finding several, I came up with these. I love that the sugar content is low(ish), and how interchangeable they are. You can make them more of a sweet treat by adding chocolate chips, or go a bit healthier breakfast bar sort with dried fruit. These turn out chewy and thick, and just yummy.

Ingredients

1 cup rolled oats
2 cups puffed rice cereal
1/3 cup honey
2 Tbsp. brown sugar
2 Tbsp. peanut butter
2 Tbsp. butter
1 Tbsp. vanilla
Pinch of salt
1 1/2 cups chocolate chips, peanut butter chips, or dried fruit-or a combination. It's your choice!

Directions

1. Heat oven to 350 degrees. Lightly grease a 9 inch baking dish.

2. Combine rolled oats and puffed rice cereal. Spread in an even layer on a rimmed cooking sheet, toast int he oven for about 10-15 minutes. Remove from oven and set aside.

3. Combine honey, brown sugar, butter, peanut butter, vanilla, and salt in a small sauce pan over medium heat. Cook until mixture is smooth, about five minutes.

4. Mix oat mixture and honey mixture together in a large bowl. Pour into prepared pan. Mix in chips or dried fruit gently. Press mixture firmly into pan, so that the surface is flat. Cover and refrigerate about 1 hour.

5. Cut the granola bars into strips and wrap them individually with plastic wrap. Store wrapped bars together in a gallon plastic bag.

The granola bars can be stored, unrefrigerated, for about two weeks. If they last that long.

Sunday, March 13, 2011

Homemade Beauty: Face Mask


A few months ago, while browsing at the library, I came across the book French Women For All Seasons by Mireille Guiliano. I have a weakness for things French, so I skimmed it. I was intrigued by the author's idea of "seasonal living," and so I checked it out. It was a lovely little read, about taking care of one's self according to the seasons, from eating to dressing to just lifestyle in general. The writer was so optimistic about life, and her book was full of positive, practical advice, that is so easy to apply to yourself.
The book spoke of beauty, with a focus of taking care of your skin. Instead of using store bought masks and peels, the author reminisced on her mother's homemade beauty masks. How quaint, yes? But also useful. Here's a homemade mask that I like and that both clarifies my dry skin and makes it soft.

Mask
dollop of honey
squeeze of lemon

Wash your face in warm water. Mix the lemon and honey together and apply to your face. Leave it on for about 20 minutes and rinse with cool water. And you're done! So simple, so easy, so practical. Quelle belle!

Tuesday, March 8, 2011

Peas with Caramelized Onions and Bacon


This year, I've been trying to make vegetables more...exciting. My family has always been good at eating their side of veggies, but I've been trying to turn the focus on the vegetables themselves.
This first started with our summer garden. I had such an abundance of home-grown produce (even though I have a very small yard, and live in the desert, where every single thing had to be grown in a container), that we had fresh vegetables every night. They tasted so good, that often I didn't have to do much with them. Big salads and grilled veggies filled our table every night. But as fall approached, our vegetable consumption began to go down. And as the holidays approached, we found ourselves back to our old ways of big-piece-of-meat-big-starch-small-veggie-portion. We were stuck in a winter food rut.
But then I read this article in the February issue of Real Simple and started getting vegetable inspired again. It was a great article, which had lots of fantastic tips from nutrition and food experts. But the main one that stuck out to me was not to worry so much about the "food groups." Instead, focus on half your plate being vegetables, a quarter being a protein, and a quarter whole grains, plus a small amount of healthy fats. So simple to remember. A little harder to actually do though, especially with a carnivore husband. and during the winter, when a variety of fresh veggies can be harder to find. Thankfully, I have no problem using good frozen vegetables.
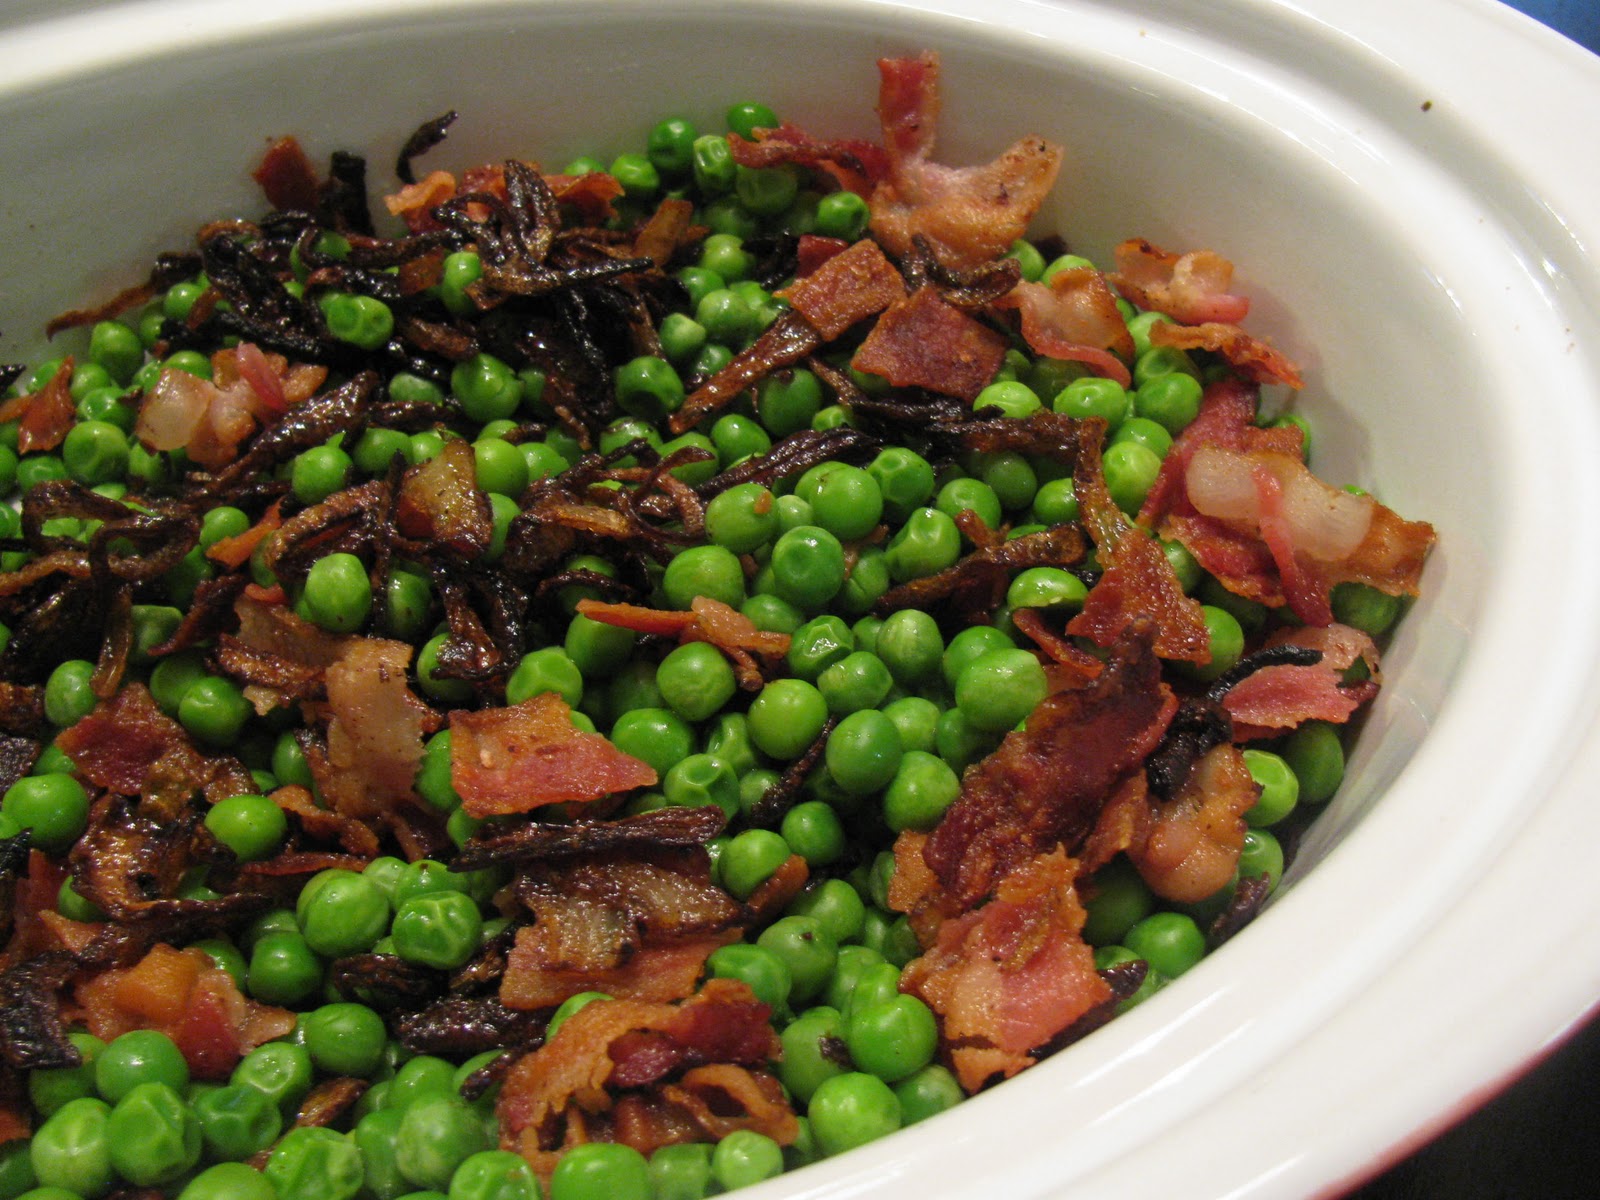
I'm working on bring veggies into the spotlight of our dinner plates. These peas do the trick.

Ingredients

1 package of frozen peas (I like Birds Eye Steamfresh Sweet Peas)
1/2 onion, sliced into thin strips
4 pieces of bacon
1 Tbsp of butter

Directions

1. In a heavy bottom pan, fry the bacon until crisp. Remove from pan and set aside on paper towels to cool.

2. Wipe out pan, leaving about 2 Tbsp. of bacon grease in pan. Heat pan over medium heat, add butter, and melt. Add sliced onions. Reduce heat to low and saute onions, stirring often, until very soft, about 15-20 minutes.

3. Meanwhile, prepare the peas according to the package, either microwaving or boiling. Set aside in a a covered dish to keep warm.

4. Once onions are soft, increase the heat to medium and cook, stirring, until very browned, about 10 minutes. Scrape the browned bits up from the bottom of the pan and mix in with the onions.

5. Crumble the bacon and add bacon and onions to peas. Serve warm.

Tuesday, March 1, 2011

Quesadillas with Homemade Refried Beans


Mexican food is a huge favorite around my house. And refried beans make a Mexican meal (I actually judge Mexican restaurants on their refried beans. If they aren't good, it ruins the whole meal for me. For reals). For years, when I cooked Mexican food at home, I just used a can of store-bought refried beans. They weren't great, or even all that good, but they completed the meal in my mind. What's enchiladas or tacos without beans? But I knew there must be something better out there, something I could do to make the refried-beans-home-experience tastier. Something that didn't include me having to buy lard (shudder).
And it turns out that there is a super easy, healthier, vegetarian way to make refried beans at home. And they are so delicious, you'll never buy canned refried beans again. For a meatless meal, these refried black beans on a cheese quesadilla make a terrific mid-week lunch or dinner.

Ingredients

2 cans black beans (do not drain)
3-4 tablespoons of olive oil
1 cup cheese (cheddar and pepper jack make a good combo, but any cheese works)
4 flour tortillas
1 tablespoon butter
avocado, sour cream, and salsa (optional)

Directions

1. In a large pan, heat the olive oil over medium-high heat. Add the beans and bring to a boil. Cover, and reduce heat to low. Simmer, stirring occasionally, until liquid is almost evaporated, about 15-20 minutes.

2. Remove from heat, and mash the beans with a potato masher or wooden spoon. Stir, cover, and return to heat until liquid is completely evaporated, but beans are still slightly moist, about 5-10 minutes. Remove from heat.

3. Shred the cheese. Lay a tortilla flat, and cover with a thin layer of refried beans. Add shredded cheese to one side and fold in half.

4. Melt butter in pan and cook quesadilla, turning once the cheese has melted. Repeat with other tortillas. Cut in half, and serve with sliced avocado, sour cream, and salsa, if desired.